When out and about, you can manage your contacts directly from the VaultRE app. This includes being able to view/edit, add, communicate, attach notes and set up caller ID for your contact data.
Additional information
Contact view breakdown
Categories - This will populate a list of all categories the contact belongs to. You can tap into the Categories to add or remove the contact from certain categories.
Contact - This will populate all contact details including their contact number and email address -
Here you are able to communicate directly with the client or tap View/Edit details to update their contact information.
You can tap on the message symbol to either message the contact directly from your phone or tap on Open Bulk Communicator to select and send an SMS template. Once you have finished sending your message, you will then have the option to create a note against the contact.
If you tap on the phone symbol, you are able to call the contact directly from your phone. Once you have finished your call, you will then have the option to add a note to record your conversation.
If you tap on the email symbol, you are able to either email the contact directly from your phone or tap on Open Bulk Communicator to select and send an email template. Once you have finished sending your email, you will also be provided an option to add a note
Linked Properties - This will populate all properties that the contact is attached to. If you tap into the property, you have the option to View Property, set or unset as the Home/Postal address against the contact, or Unlink the property from the contact. You also have the option to tap into Link property to attach a new or existing property against the contact.
Requirements - This will populate all Buy/Rent requirements against the contact. If you tap into the requirement, you are able to edit the contact's requirements or delete the requirement if it is no longer relevant. You also have the option to tap Add requirement to add additional Buy/Rent requirements against the contact.
Files - Here you are able to find all files that have been uploaded into the contact filing cabinet. You have the option to view the file by tapping into the file name. We also provide the option to share the file with an existing/new contact or upload further files from your device by tapping on Attach file.
Notes - This will populate all notes that have been added against the contact. You have the option to toggle between property check-in specific notes by taping on Show check ins. We also provide the option to add further notes by tapping on Add note - Here you are able to enter your note, set a reminder and select the desired note type.
Adding notes against a contact
1. Navigate into the desired contact
2. Scroll to the Notes section at the bottom of the contact details
3. Tap Add note in the top right-hand corner
4. Add the details of your note, add a reminder if required and select the desired note type
5. Once completed, you can then tap on Save in the top right-hand corner to add the note against the contact
TIP: Enable voice-to-text on your Android device in order to have the option to add in the note via your voice (your device will step through this when hitting the microphone for the first time).
Adding in a contact
1. Navigate into the Contacts menu > tap into + ADD CONTACT in the bottom right-hand corner
2. Select the type of contact from the dropdown at the top, then continue to add all the required contact details, the marketing contact(s), and set the edit & view/read access settings
3. Once completed, you can then tap Save in the top right-hand corner to add the contact
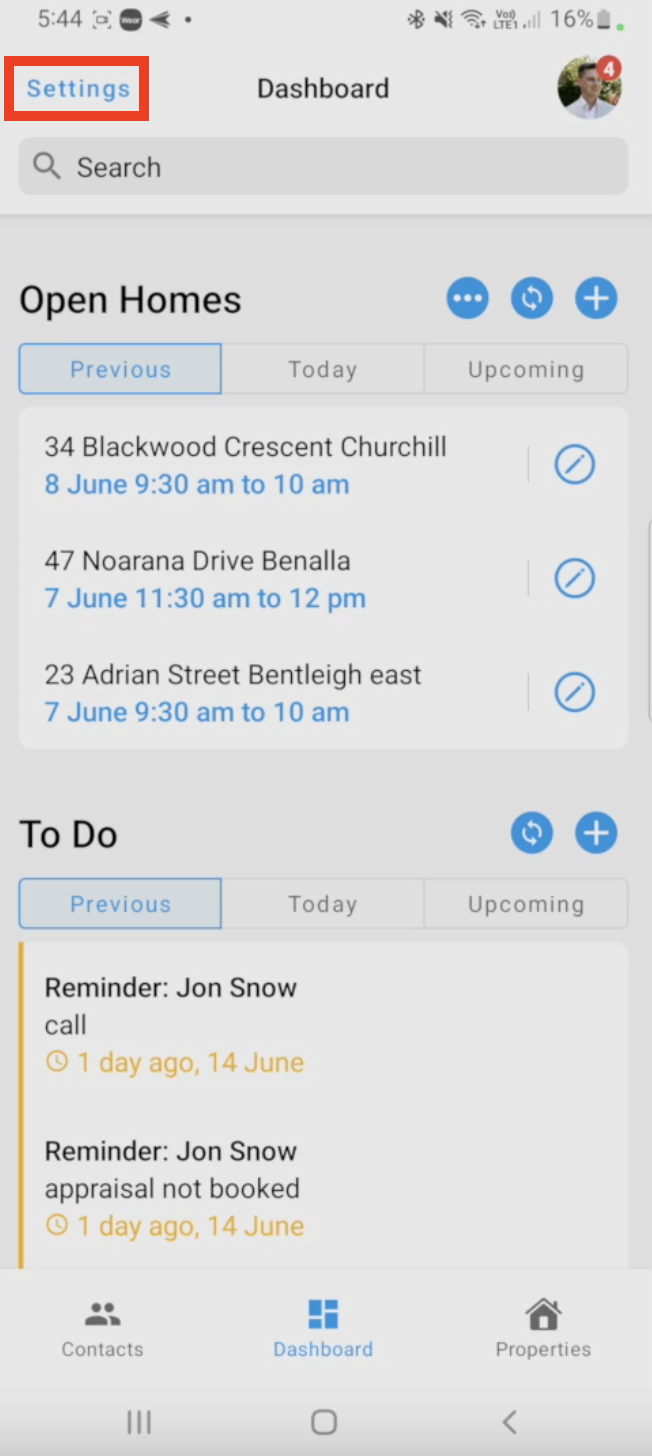
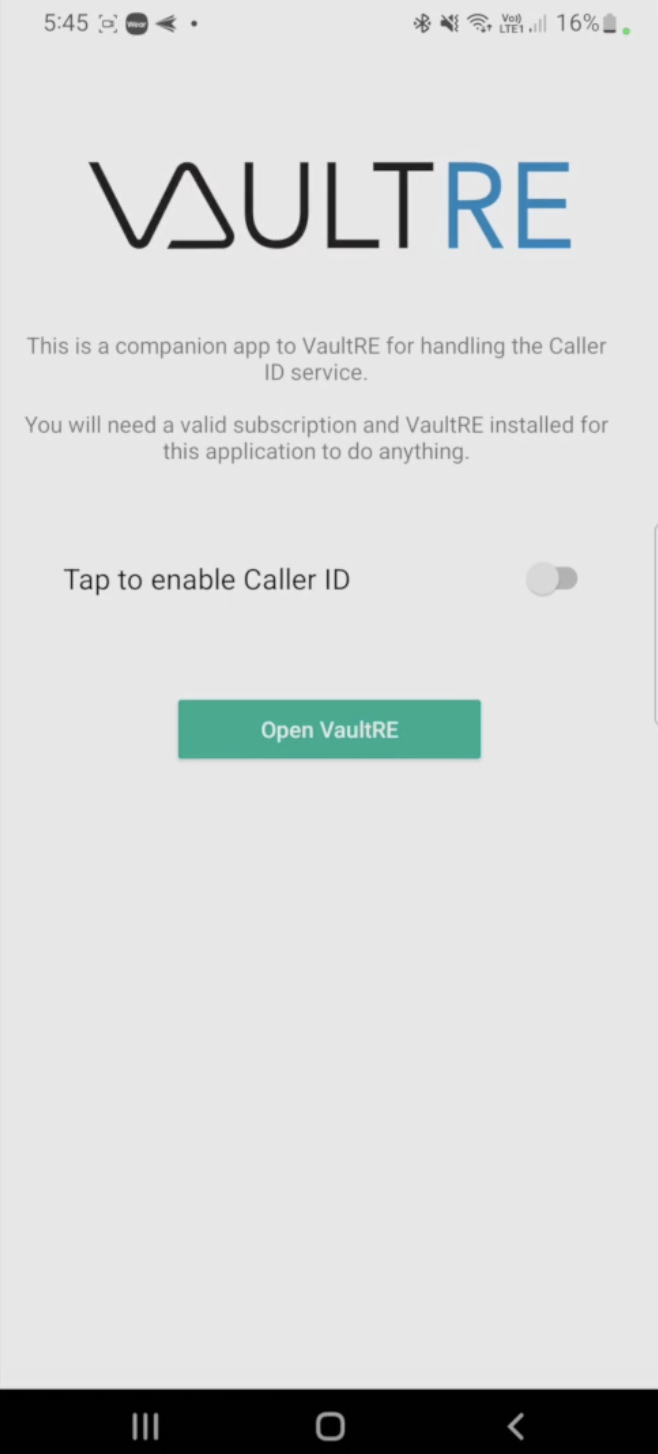
Setting up caller ID
1. Go to the VaultRE App > Tap Settings
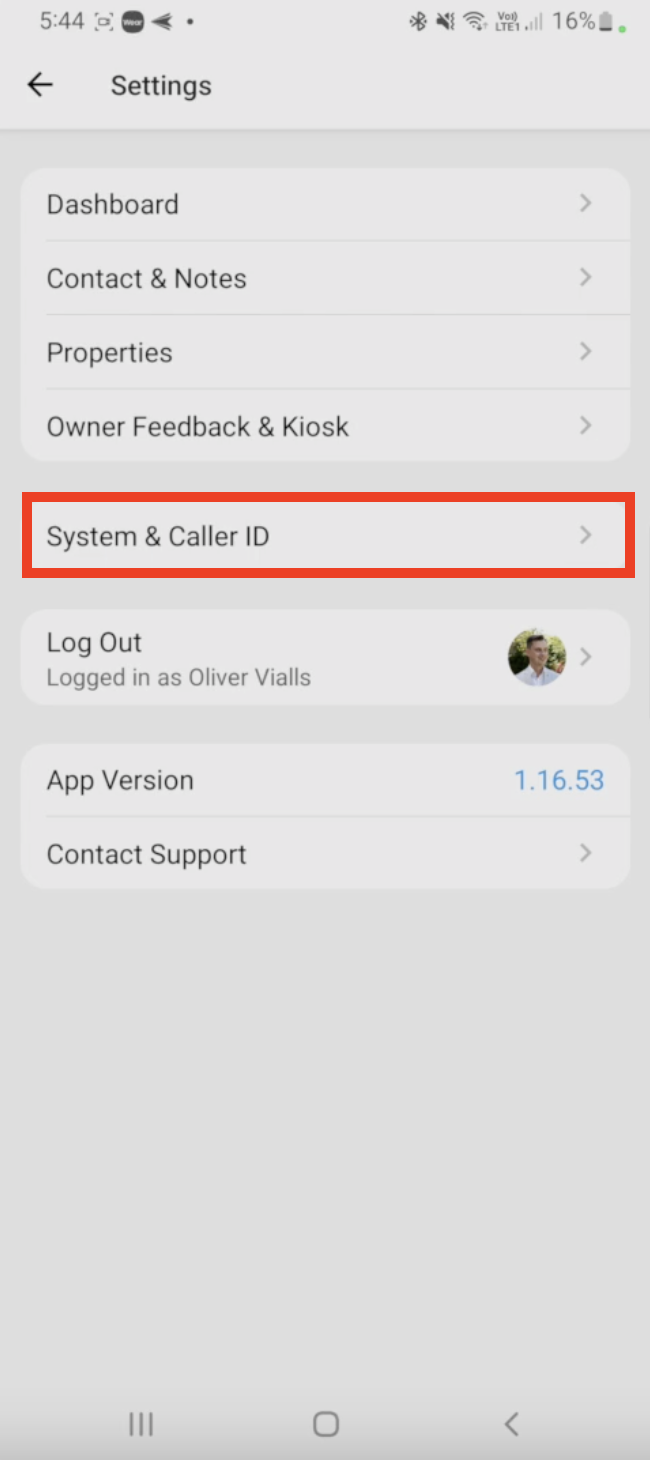
2. Tap System & Caller ID
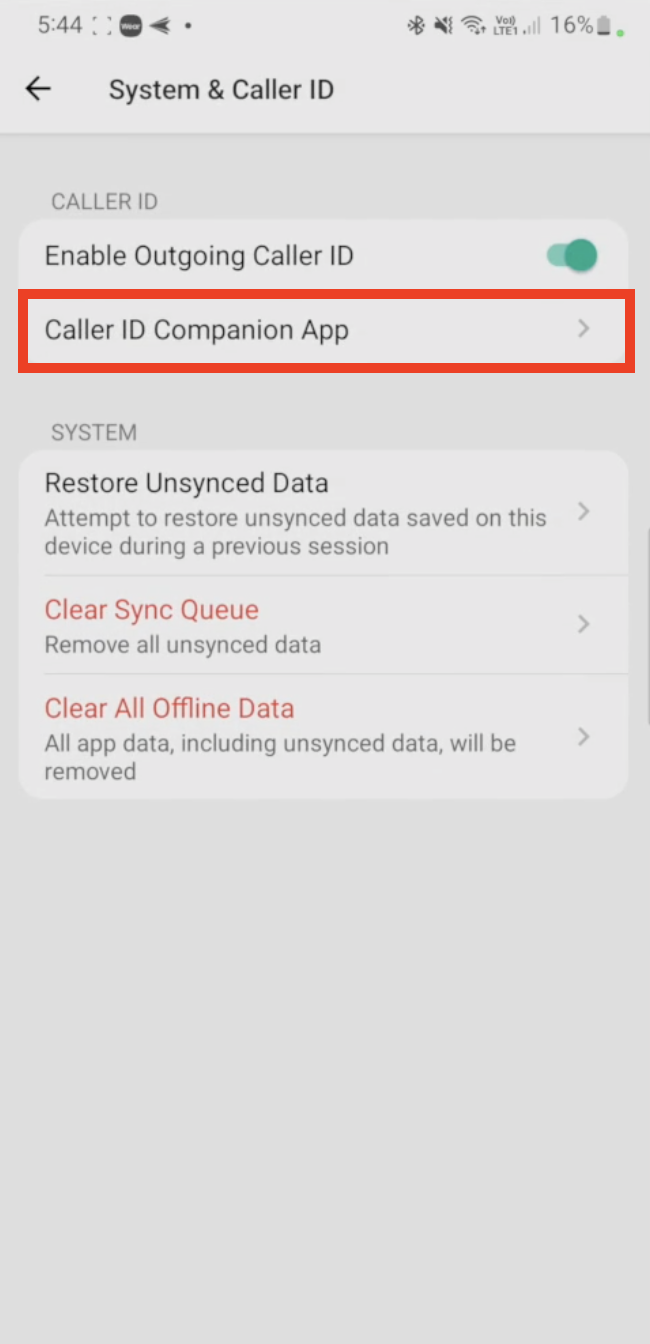
3. Tap Caller ID Companion App
4. This will then open the Play Store, where you will be required to download and install the VaultRE: Caller ID App
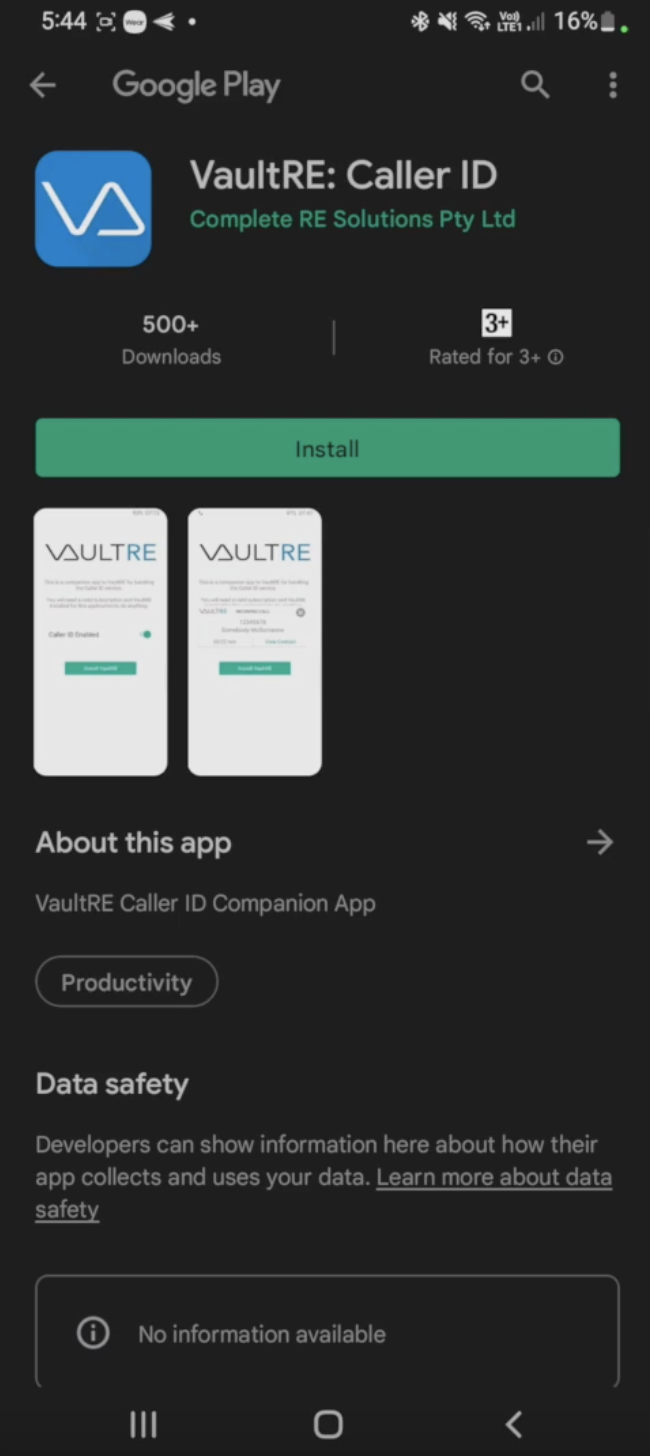
The Caller ID app is required for the caller ID function to work within the android VaultRE App.
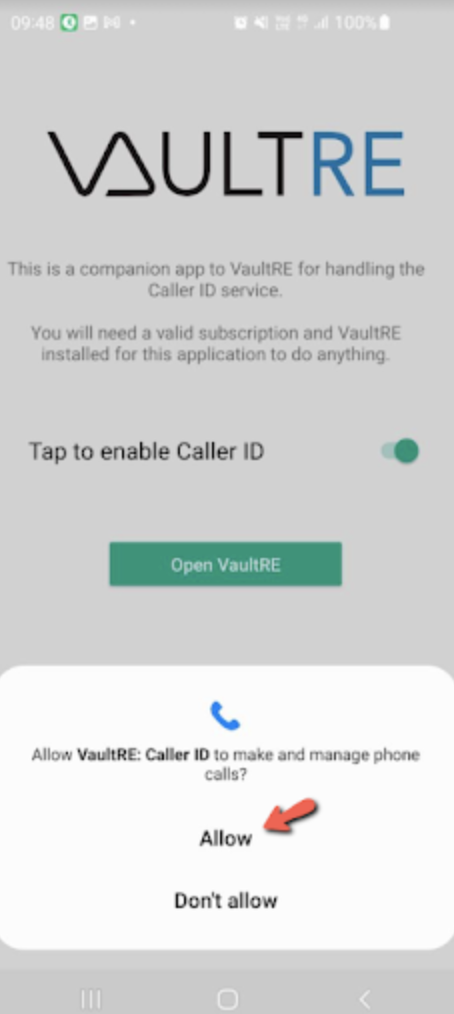
6. Tap Allow on both permissions
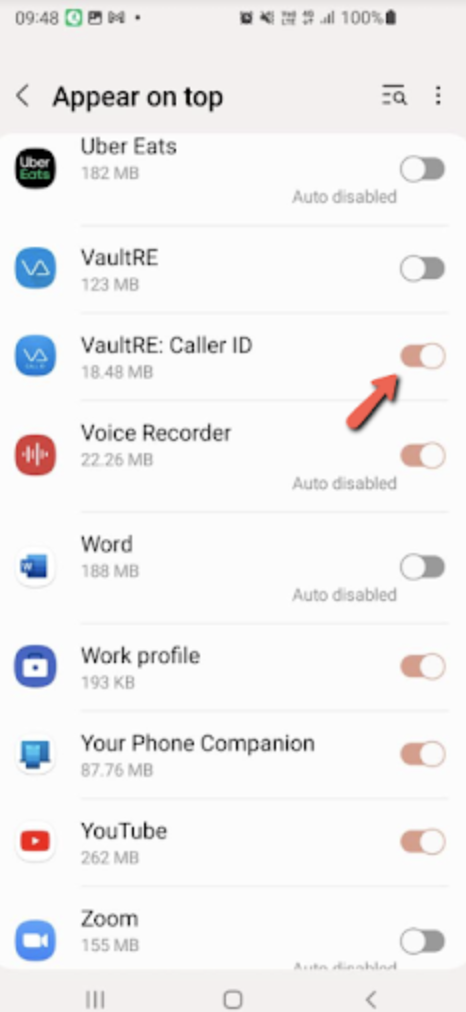
7. Lastly, toggle the VaultRE: Caller ID App to appear on top
Was this article helpful?
That’s Great!
Thank you for your feedback
Sorry! We couldn't be helpful
Thank you for your feedback
Feedback sent
We appreciate your effort and will try to fix the article