The VaultRE app is the perfect way to record your open home attendees or private viewings. This ensures that you are able to capture your inspection data for further use.
Open Home Check-in Process
Adding a Scheduled Viewing and Check-in Process
Additional information
Creating a Scheduled Viewing
You can schedule a viewing via the calendar widget, by following the below steps.
1. Tap into the desired calendar date
2. Tap on the plus (+) symbol > Scheduled Viewing tab
3. You are then able to search for the property address, add an existing or new contact, set the start and end date/time, and also have the option to add the scheduled viewing to your phone calendar
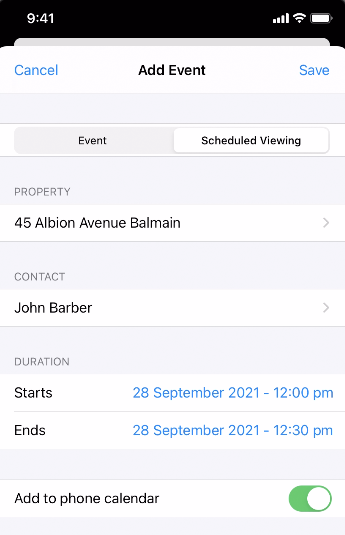
4. Once completed, you can tap Save to add the scheduled viewing
Adding Open Homes
We provide the option to add further open inspection dates/times via the Open Homes widget. This can be done by following the below steps:
1. Tap on the plus (+) symbol
2. You are able to search and select the property address, set the start time/duration and also have the option to toggle to add the open home to your phone calendar
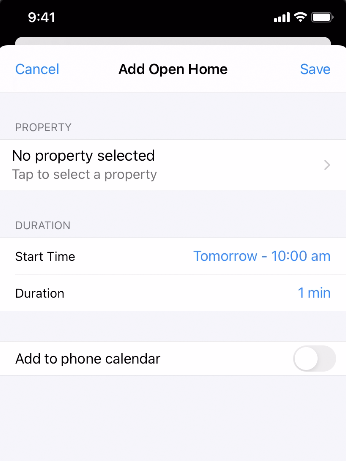
3. Once completed, tap Save to add the open home
You can also edit an existing Open Home, by tapping on the edit (Pencil) symbol next to the Open Home showing in the widget.
Kiosk Mode & QR Code Check-in Process
We provide the option to set up Kiosk Mode or produce a QR Code for a contactless check-in process. This can be done via the below steps:
Kiosk Mode Check-in
1. Tap into the property that you are conducting the open home for
2. Select Kiosk Mode
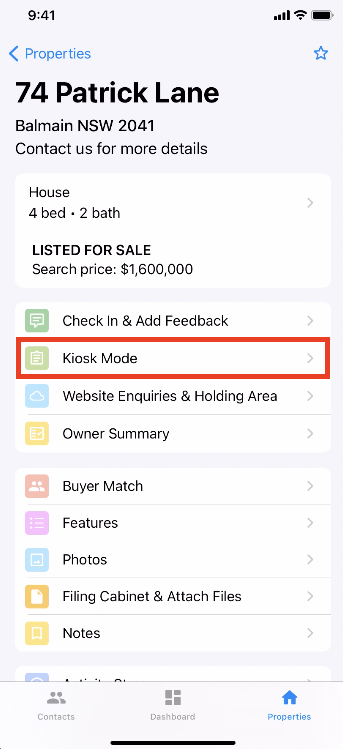
3. This will then place the device in Kiosk Mode, to which the open home attendees may check themselves in by following the steps provided
We recommend locking your device so attendees cannot navigate within your device. This can be done by activating Guided Access as shown in the below steps.
1. Open your settings app (for your device, not within the Vault app)
2. Swipe down to search for "Guided Access", then open that option
3. Toggle the Guide Access tickbox on
4. Now that guided access is active you do not need to repeat steps 1-4 for future kiosk mode usage
5. Now open the Vault app and navigate to the kiosk mode as per the above process
6. Triple press your home button and follow the prompts to activate guided access and triple press your home button once more to turn off Guided Access
QR Code Check-in
1. Tap into the property that you are conducting the open home for
2. Tap Check In & Add Feedback
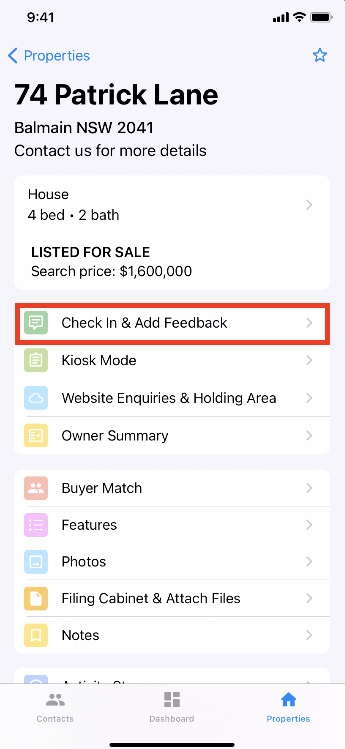
3. Tap the QR Code symbol in the top right-hand corner
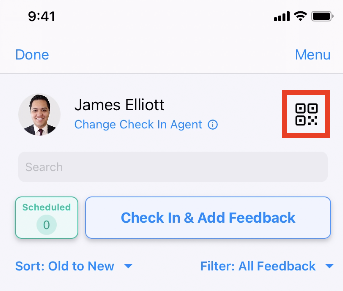
4. This will then bring up the QR Code for the property, to which the open home attendees may check themselves in by scanning the QR Code and providing their details
Alternatively, you have the option to print a QR Code from the web version of Vault, by navigating into the listing > Selecting the Other or Open Homes tab > Print QR Check-In. This does not need to be printed for each open home, as the same QR Code can be used for the entire listing campaign.
QR Code check-ins do not scan for any potential duplicate contacts. These check-ins will be added to your enquiry/holding area and will need to be processed prior to them appearing in your database/the owner feedback report.
Processing enquries in the Holding Area
Once a contact has been checked-in via the QR code, you can process their check-in from the Holding Area widget. This can be done by following the below steps:
1. Navigate into the Holding Area widget on your Dashboard or if you are currently in the property, tap Website Enquiries / Holding Area
2. Tap into the client record > tap Check In / Add Feedback

3. Once here, you can check for potential duplicates and add further details if required
4. When completed, tap Save to process the enquiry - This will then populate the enquiry/contact against the listing
You have the option to click on Process Enquiry to automatically process the enquiry without checking for potential duplicates/adding further details or you can choose to Ignore Enquiry to remove the enquiry altogether.
Setting up Automatic Message
You have the option to set up an automatic SMS or Email to be sent to the inspection attendee at the time they are checked in. This can be set up by following the below steps:
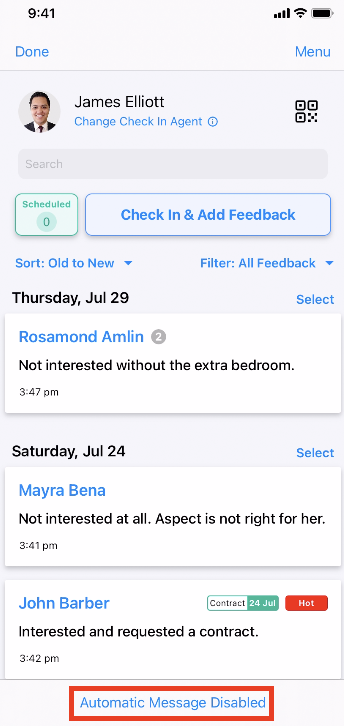
1. Navigate into the property
2. Tap Check In & Add Feedback > Tap Automatic Message Disabled
3. You will then have the option to select the Automatic dropdown to enable an automatic SMS or Email. Once selected you are then able to create a new response in the message section or select an existing SMS or Email template
Once set up, the applied (SMS or Email) template will become the default for ALL open inspections conducted on the device moving forward - Template merge fields are therefore recommended. The configuration can be modified or deactivated at any time.
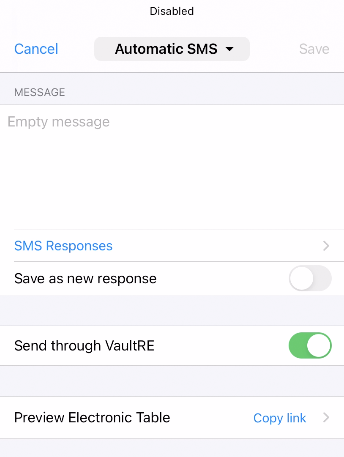
4. Once you are happy with your automatic response, you can toggle to send through VaultRE or via your mobile and then click on Save to complete the set-up
If sending an SMS response via VaultRE is toggled, each SMS/TXT sent will incur a charge per SMS part (each part is 153 characters of text if the total message length is over 160 characters).