Whilst there are multiple ways in which you are able to add a contact to your database, below is a step-by-step guide on how to add a contact via your web login.
Step by step
1. Go into Contacts > Add Contacts

2. Select the correct contact type
3. Add the required contact details - This includes a first name, last name, contact number, and/or email address
4. Select the Marketing Contact - This will be the user(s) in the office the client is building a relationship with
5. Set the Access settings for both View/Read and Edit Access - This can be ticked for Everyone should you have an open database, otherwise you can select individual staff members for a closed database
6. Click Save/Update to add the contact into your database
Additional information
Your account will have three standard contact Types:
- Client/Person
- Company
- Creditor/Supplier
Selecting the Company type, will update the required fields and remove the contact name/partner name fields.

Selecting the Creditor/Supplier type will provide all the same fields the Client/Person type has, however, must be used for the Creditor/Supplier to be allocated maintenance jobs from within Property Management.
 The Greeting field is designed to be used on any email/SMS/TXT/letter or document and is the data used to personalise the communication. This field allows you to populate the greeting, as opposed to the first name of the client.
For example, Adam Clark and Sue Jones can be Sue & Adam, i.e. Any email after “Dear”, VaultRE will populate Dear, “Adam & Sue”, based on the greeting field on the contact.

The Envelope Greeting field is used to address an envelope or a formal letter. In the example of the envelope greeting, we had added A Clark & S Jones.

The Legal Description is the full name of the contacts and can be used for any legal documentation. i.e. Adam’s full name may be Adam Stephen Clark and Sue’s may be Suzanne Jane Jones.

Multiple contact numbers & email addresses can be added: (Note: All email addresses ticked, will be included in bulk eMarketing)
Address Details can contain the contact's living address and also allow you to add a separate postal address. When entering a PO Box, you can just use the Street Name & Suburb field.

The user assigned to Marketing Contact refers to the user(s) in the office the client is building a relationship with. There are two Marketing Contacts available.

You are then able to assign user/s who have the ability to view/read the contact and who have access to edit the contact.

Assign the Source of Enquiry to the contact (i.e. Where the contact has come from?)
 Further options are provided to archive, unsubscribe or add a contact to the Do Not Call Register
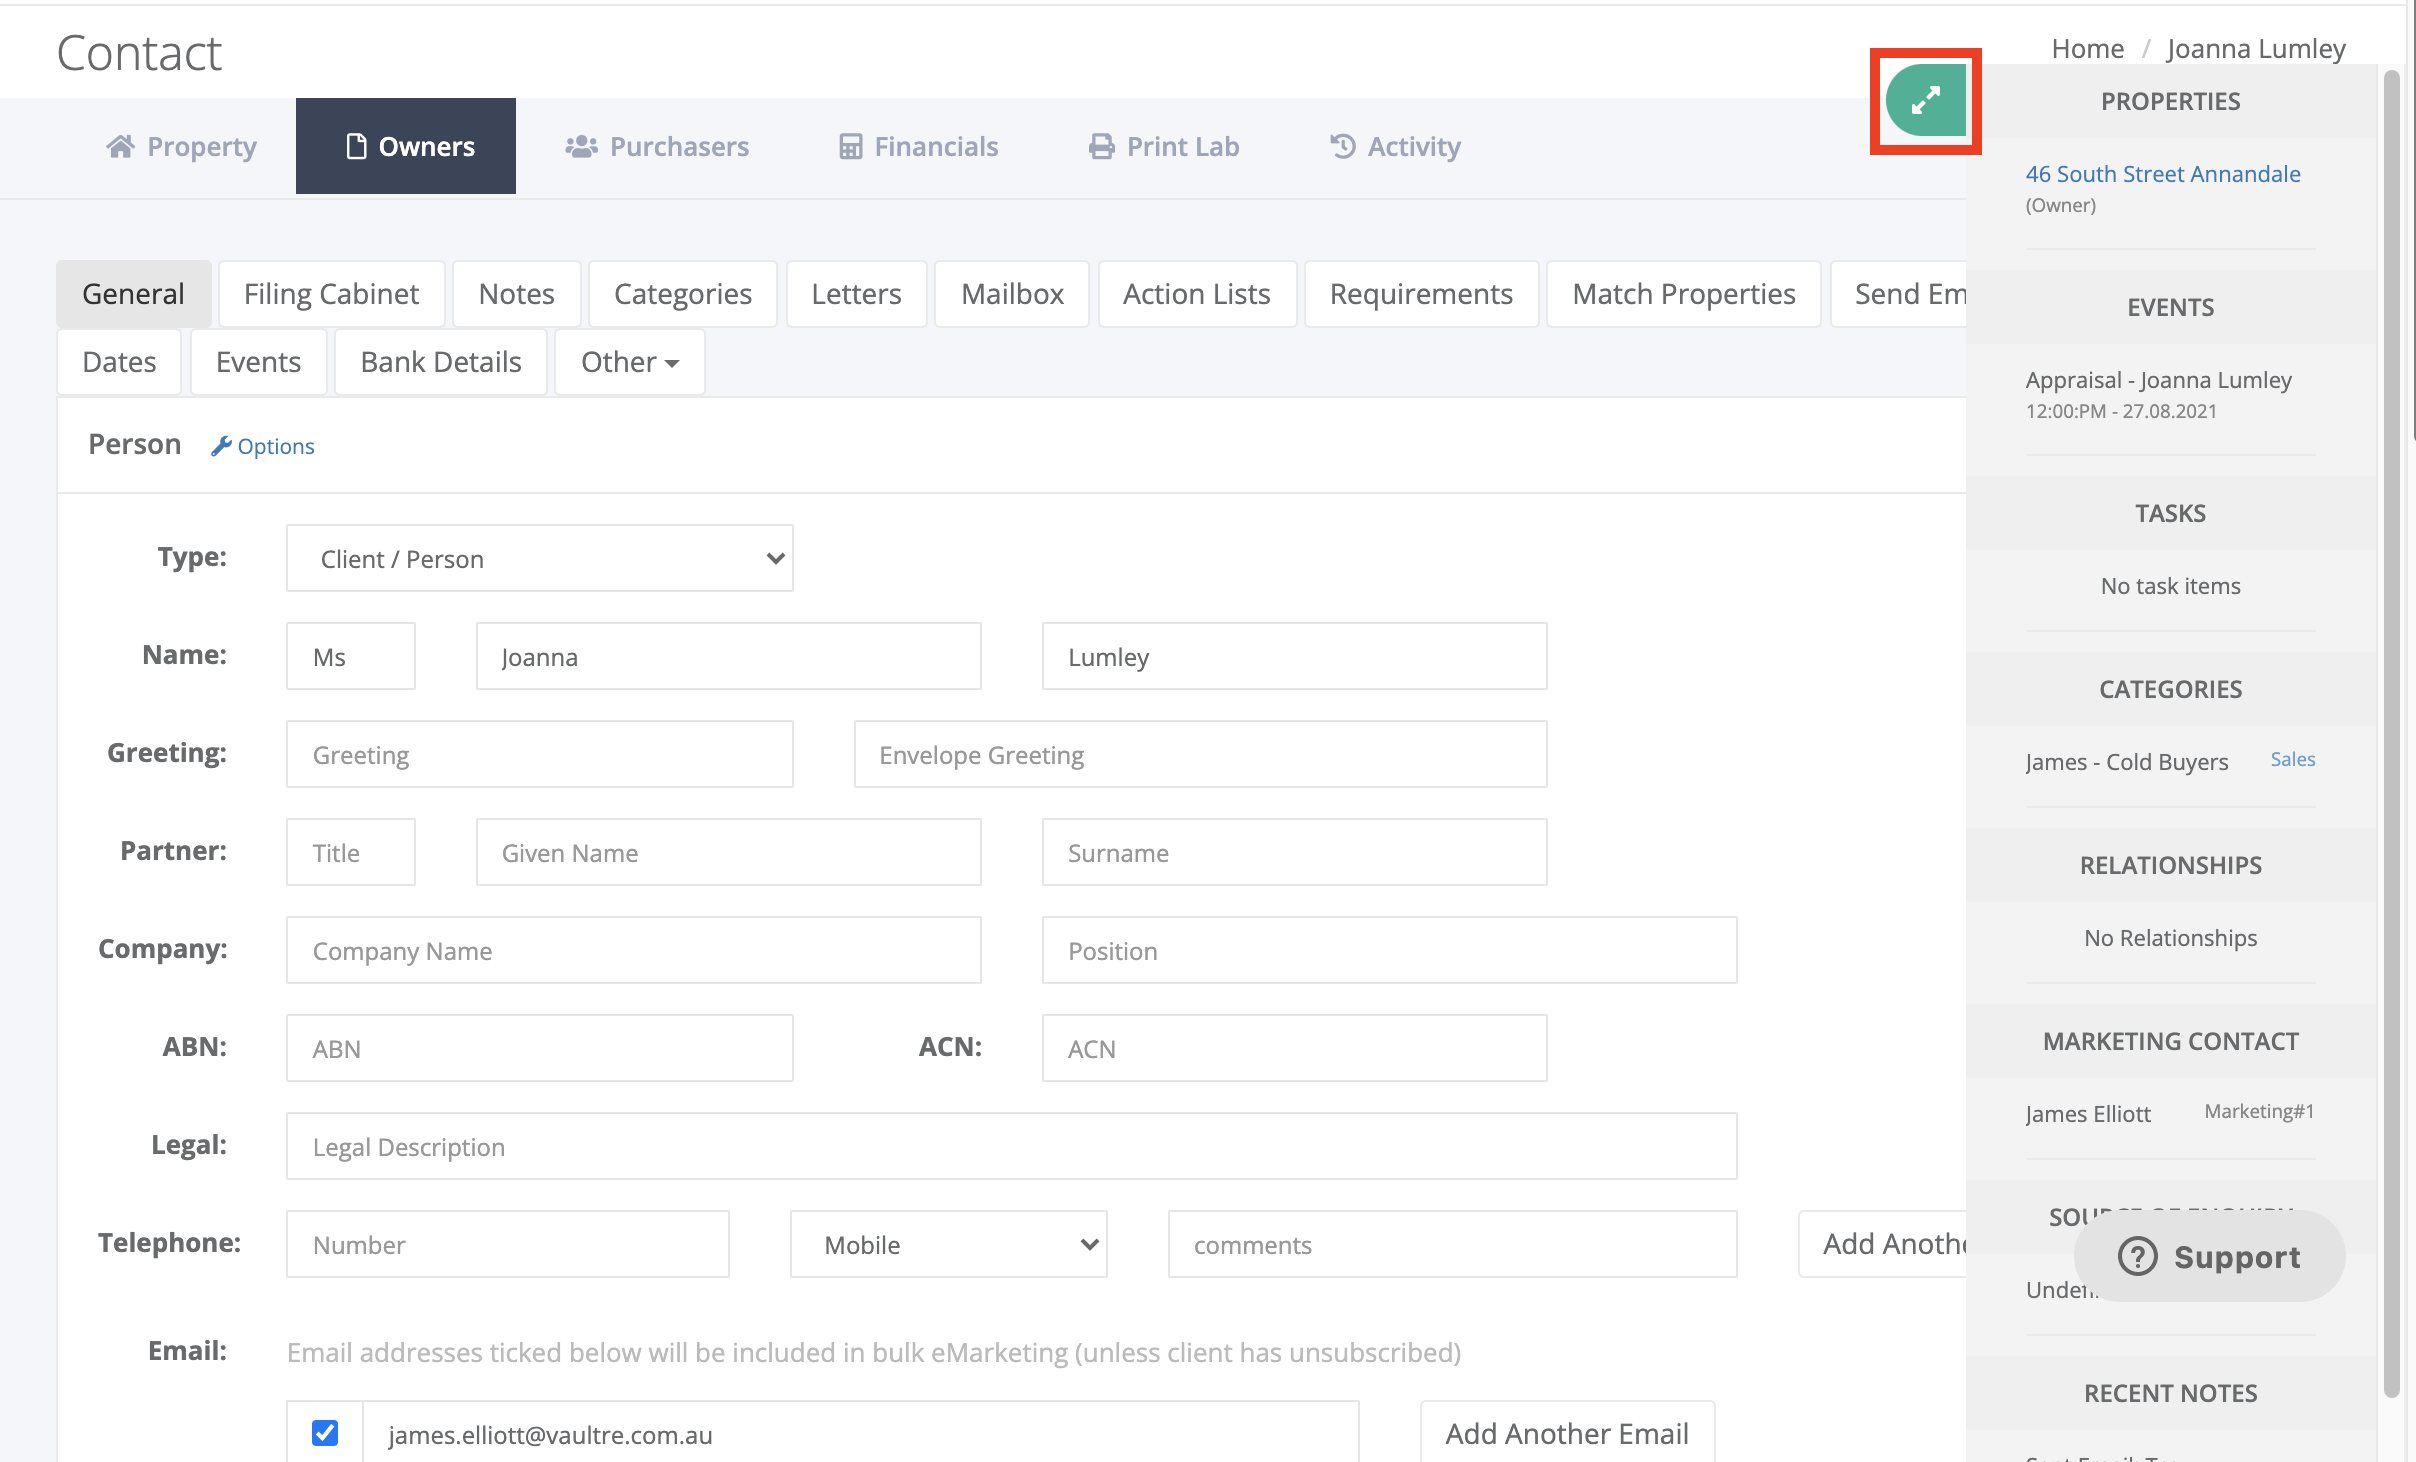
Once the contact has been added, you have the option to view the contact snapshot, which can be accessed on each tab of the contact card via the green expander tab on the right-hand side. This snapshot will provide a quick breakdown of any properties attached to the contact, upcoming events, task, categories, relationships, marketing contacts, Source of enquiry and any recent notes added.
Was this article helpful?
That’s Great!
Thank you for your feedback
Sorry! We couldn't be helpful
Thank you for your feedback
Feedback sent
We appreciate your effort and will try to fix the article